You have to understand this first about non-standard mechanical design
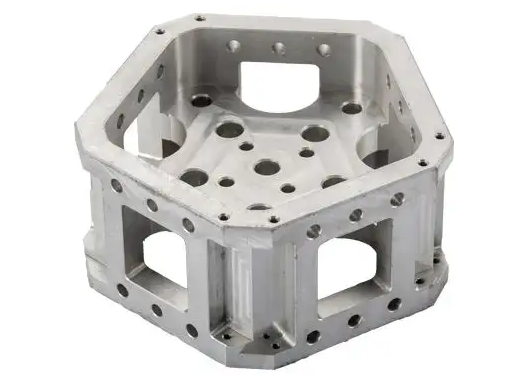
Due to the large thermal expansion coefficient of aluminum alloy parts, it is easy to deform in the process of thin-wall machining. Especially when using free forging blank, the machining allowance is large, and the deformation problem is more prominent.
1. Causes of machining deformation
There are many reasons for the machining deformation of aluminum alloy parts, which are related to the material, part shape, production conditions and the performance of cutting fluid. It mainly includes the following aspects: deformation caused by internal stress of blank, deformation caused by cutting force and cutting heat, and deformation caused by clamping force.
2. Technological measures to reduce machining deformation
(1) Reduce the internal stress of the blank
Natural or artificial aging and vibration treatment can partially eliminate the internal stress of the blank. Pre processing is also an effective process method. For the blank with fat head and big ears, due to the large allowance, the deformation after processing is also large. If the surplus part of the blank is processed in advance and the allowance of each part is reduced, it can not only reduce the processing deformation of the subsequent process, but also release part of the internal stress after being placed for a period of time.
(2) Improve the cutting ability of cutting tools
The material and geometric parameters of cutting tools have an important impact on cutting force and cutting heat. The correct selection of cutting tools is very important to reduce the machining deformation of parts.
A. Reasonably select the geometric parameters of the tool.
Rake angle: under the condition of maintaining the strength of the blade, the rake angle should be appropriately larger. On the one hand, it can grind a sharp edge, and on the other hand, it can reduce the cutting deformation, make the chip removal smooth, and then reduce the cutting force and cutting temperature. Do not use negative rake tools.
Back angle: the size of the back angle has a direct impact on the wear of the back knife surface and the quality of the machined surface. Cutting thickness is an important condition for selecting back angle. During rough milling, due to the large feed rate, heavy cutting load and large calorific value, it is required that the tool heat dissipation conditions are good. Therefore, the back angle should be smaller. When the milling edge is large, the friction angle with the back edge should be reduced, so the back edge should be sharp.
Helix angle: in order to make milling smooth and reduce milling force, the helix angle should be as large as possible.
Main deflection angle: properly reducing the main deflection angle can improve the heat dissipation conditions and reduce the average temperature of the processing area.
B. Improve tool structure.
Reduce the number of milling cutter teeth and increase the chip holding space. Due to the large plasticity of aluminum alloy material, large cutting deformation in machining and large chip holding space, it is better to have a large radius of chip holding groove bottom and a small number of milling cutter teeth. For example, φ The milling cutter below 20mm adopts two cutter teeth; φ 30- φ Three cutter teeth are better for 60mm milling cutter to avoid the deformation of thin-walled aluminum alloy parts caused by chip blockage. Fine grinding of cutter teeth: the roughness value of the cutting edge of the cutter teeth shall be less than RA = 0.4um. Before using a new knife, gently grind the front and back of the knife teeth with a fine oilstone to eliminate the residual burrs and slight serrations when grinding the knife teeth. In this way, not only the cutting heat can be reduced, but also the cutting deformation is relatively small.
C. Strictly control the wear standard of tools:
After tool wear, the workpiece surface roughness increases, the cutting temperature increases, and the workpiece deformation increases. Therefore, in addition to the selection of tool materials with good wear resistance, the tool wear standard should not be greater than 0.2mm, otherwise it is easy to produce chip buildup. During cutting, the temperature of the workpiece shall not exceed 100 ℃ to prevent deformation.
D. Improve the clamping method of workpiece.
For thin-walled aluminum alloy workpieces with poor rigidity, the following clamping methods can be adopted to reduce deformation:
For thin-walled bushing parts, if they are clamped radially with three jaw self centering chuck or spring collet, once they are loosened after processing, the workpiece will inevitably deform. At this time, the axial end face compression method with good rigidity should be used. Locate with the inner hole of the part, make a self-made threaded mandrel, insert it into the inner hole of the part, press the end face with a cover plate, and then tighten it with a nut. When machining the outer circle, the clamping deformation can be avoided, so as to obtain satisfactory machining accuracy.
When processing thin-walled sheet metal workpiece, it is best to select vacuum suction cup to obtain evenly distributed clamping force, and then process with small cutting parameters, which can well prevent workpiece deformation.
In addition, the packing method can also be used. In order to increase the process rigidity of thin-walled workpiece, medium can be filled in the workpiece to reduce the deformation of workpiece during clamping and cutting. For example, fill the workpiece with urea melt containing 3% – 6% potassium nitrate. After processing, immerse the workpiece in water or alcohol to dissolve and pour out the filler.
E. Reasonably arrange the process.
In high-speed cutting, due to the large machining allowance and intermittent cutting, the milling process often produces vibration, which affects the machining accuracy and surface roughness. Therefore, NC High-speed machining process can be generally divided into; Rough machining – semi finishing – corner cleaning – finishing and other processes. For parts with high precision requirements, it is sometimes necessary to carry out secondary and semi finishing, and then finish machining. After rough machining, the parts can be cooled naturally to eliminate the internal stress caused by rough machining and reduce deformation. The allowance left after rough machining shall be greater than the deformation, generally 1-2mm. During finish machining, the finished surface of parts should maintain a uniform machining allowance, generally 0.2-0.5mm, so that the tool is in a stable state in the machining process, which can greatly reduce the cutting deformation, obtain good surface machining quality and ensure the accuracy of products.
3. Operating skills
In addition to the above reasons, the operation method is also very important in practical operation.
(1) For parts with large machining allowance, in order to have better heat dissipation conditions in the machining process and avoid heat concentration, symmetrical machining should be adopted during machining. If a 90mm thick sheet needs to be processed to 60mm, if one side is milled and the other side is milled immediately and processed to the final size at one time, the flatness will reach 5mm; If repeated feed symmetrical processing is adopted, each side is processed to the final size twice to ensure the flatness of 0.3mm.
(2) If there are multiple cavities on the plate part, as shown in Figure 4. When machining, it is not suitable to adopt the sequential machining method of one cavity one cavity, which is easy to cause uneven stress and deformation of parts. It adopts multiple processing in layers, and each layer shall be processed to all cavities at the same time as far as possible, and then the next layer shall be processed to make the parts bear the force evenly and reduce the deformation.
(3) Reduce cutting force and cutting heat by changing cutting parameters. Among the three elements of cutting parameters, the back draft has a great influence on the cutting force. If the machining allowance is too large and the cutting force of one-time tool walking is too large, it will not only deform the parts, but also affect the rigidity of the machine tool spindle and reduce the durability of the tool. If we reduce the amount of back knife, the production efficiency will be greatly reduced. However, in NC machining, it is high-speed milling, which can overcome this problem. While reducing the back draft, as long as the feed is increased accordingly and the rotating speed of the machine tool is increased, the cutting force can be reduced and the machining efficiency can be guaranteed.
(4) Pay attention to the order of cutting. Rough machining emphasizes the improvement of machining efficiency and the pursuit of cutting rate per unit time. Generally, reverse milling can be used. That is to cut off the excess material on the surface of the blank at the fastest speed and in the shortest time, and basically form the geometric contour required by finishing. The finishing emphasizes high precision and high quality, and it is appropriate to adopt forward milling. Because the cutting thickness of the cutter teeth gradually decreases from the maximum to zero during forward milling, the work hardening degree is greatly reduced and the deformation degree of the parts is reduced at the same time.
(5) The thin-walled workpiece is deformed due to clamping during machining, which is difficult to avoid even fine machining. In order to minimize the deformation of the workpiece, the pressing part can be loosened before the finish machining is about to reach the final size, so that the workpiece can be freely restored to the original state, and then slightly pressed, subject to the rigid clamping of the workpiece (completely by hand feeling), so as to obtain the ideal machining effect. In short, the action point of the clamping force is best on the bearing surface. The clamping force should act in the direction of good rigidity of the workpiece. On the premise of ensuring that the workpiece is not loose, the smaller the clamping force, the better.
(6) When machining parts with cavity, try not to let the milling cutter directly plunge into the parts like a drill bit when machining the cavity, resulting in insufficient chip holding space of the milling cutter and unsmooth chip removal, resulting in overheating, expansion, tool collapse, tool breakage and other adverse phenomena of the parts. First drill the cutter hole with a drill bit of the same size or larger than the milling cutter, and then mill with a milling cutter. Alternatively, the spiral cutting program can be produced with CAM software.
4. The workpiece surface turns black
Aluminum oxide processing aluminum alloy casting is generally cast by metal mold. Metal aluminum and aluminum alloy have good fluidity and plasticity, but they are easy to turn black in the process of use. The reasons are as follows:
(1) Unreasonable process design. Improper treatment of aluminum alloy die castings after cleaning or pressure inspection creates conditions for mold and blackening of aluminum alloy die castings and accelerates the formation of mold.
(2) Storage management is not in place. The moldy condition of aluminum alloy die castings is also different when they are stored at different heights in the warehouse.
(3) Internal factors of aluminum alloy. Many aluminum alloy die casting manufacturers do not do any cleaning treatment or simply flush with water after the die-casting and machining processes. There are residual release agent, cutting fluid, saponification fluid and other corrosive substances and other stains on the surface of die-casting aluminum, which accelerate the blackening speed of long mildew spots of aluminum alloy die-casting parts.
(4) External environmental factors of aluminum alloy. Aluminum is an active metal, which is easily oxidized, blackened or moldy under certain temperature and humidity conditions, which is determined by the characteristics of aluminum itself.
(5) Improper selection of cleaning agent. The selected cleaning agent is highly corrosive, causing corrosion and oxidation of die-casting aluminum.


