How to select the best fastener for 3D printed parts
We have encountered many problems regarding the best way to fasten different 3D printing components. For example, when prototyping hardware products, it is usually necessary to make more complex assembly structures than a single 3D printing component, such as electronic enclosures or robot components.
Sometimes, you may need to print the components of the building package of a 3D printer that is too large, so you need to consider the method of permanently or intermittently assembling the printing parts.
One method of assembling 3D parts is to use snap fit components, but another good method is to use threads.
There are many different ways to implement threading in the 3D printing unit, so we will introduce the advantages and disadvantages of the most common methods and the specific installation steps to help you get started.
Threaded insert
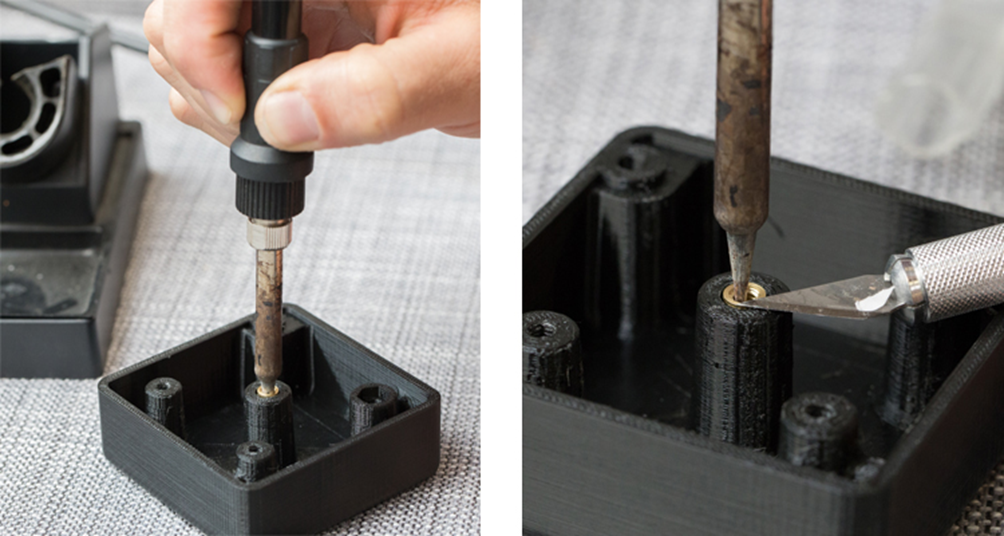
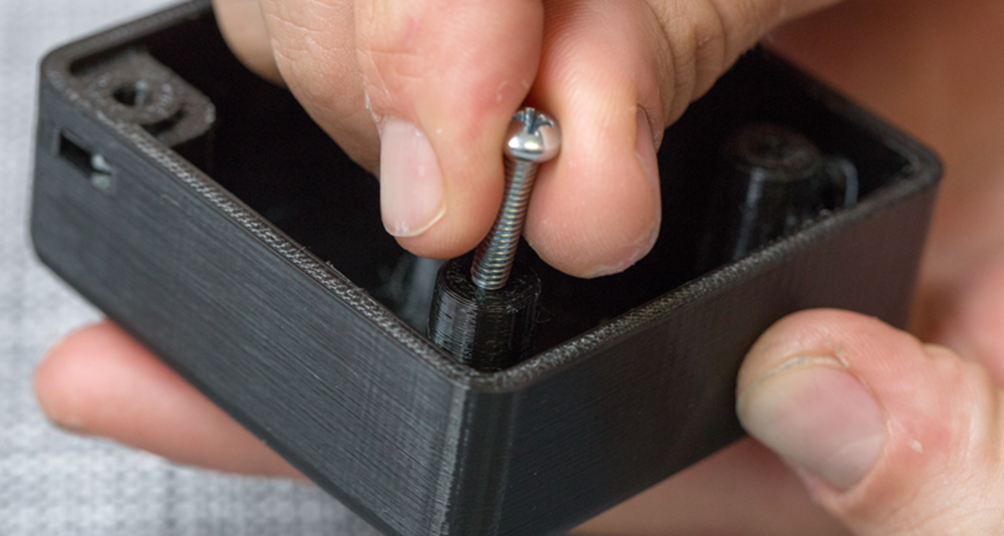
Our preferred method, and the method we most often recommend, is to use threaded inserts because they are easy to install and feel great.
Advantages: fast, simple and clean; Unlimited assembly/disassembly; Production quality
Disadvantages: more expensive; Need to increase wall thickness
Materials and tools: brass insert; Soldering iron; Precision knife
Installation steps:
1. Place the insert into the relevant hole to be pushed
2. Use a heated soldering iron to place it in the middle of the insert and apply a small amount of pressure.
3. When the insert starts to heat, you will see it sink into the hole
4. Once the blade looks flush with the part surface, please use your precise blade to check and trim any excess materials
Self tapping screw

Another method of threaded inserts is to use self tapping screws. If you want fast but dirty things, this is the simplest and cheapest method. So if this is your first prototype or you are using low resolution materials, such as PLA, self tapping screws are a good choice.
Advantages: simple installation; Minimum design requirements; cheap
Disadvantages: brittle materials may crack; Limited assembly/disassembly; Low strength; Materials and tools; Self tapping screw
Installation steps:
1. It’s as simple as a screwdriver and a screw… just twist it
Design threads into 3D models
When designing parts that require very large threads, the best way is to design the threads into the 3D model itself.
Advantages: User defined thread can be designed; Very good when the insert is not available (i.e. M50 thread); Suitable for brittle materials
Disadvantages: the thread will be worn over time; It is difficult to model accurately; High resolution printing is required; Materials and tools
None (CAD only)
Installation steps:
1. Ensure accurate thread modeling
2. Use high-resolution materials to print components
3. For internal threads, use a tap to “finish” the thread. If you do not have a tap available, try using a machine screw.
4. For external thread, please use the steel nut that matches your thread size and use it to complete the thread on the part.
5. Make sure that the through-hole of the component is fully tapped – this will ensure that excess material is removed from the tapping feature and that the part is ready for fastening.
6. For blind holes, ensure that the tapping depth is sufficient for assembly, and ensure that any excess material is cleaned (trying to screw fasteners into parts with debris may damage your function).
When using this method to add threads to a printed part, ensure that they are aligned vertically with the thread feature; Special attention should be paid to avoid cross threading, which may cause permanent damage to parts.
Cut the thread with a tap
Related Posts