How to draw shaft parts? How to select materials for shaft parts with different purposes?
The main function of shaft parts is to support other rotating parts to rotate and transmit torque, and at the same time, it is connected with the machine frame through bearings. It is one of the important parts of the machine.
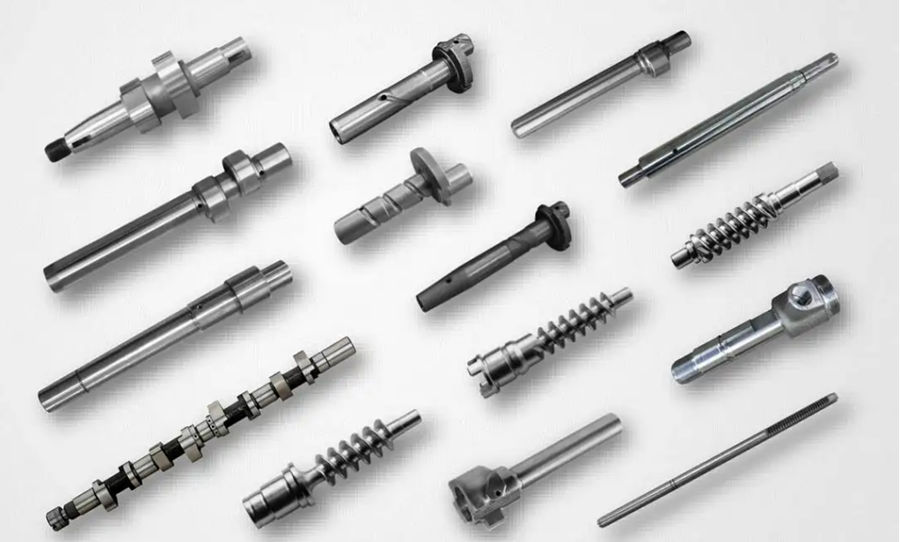
Shaft parts are rotary parts, whose length is greater than the diameter, and are usually composed of cylindrical surface, conical surface, internal hole, thread and corresponding end face. The shaft often has splines, keyways, transverse holes, grooves, etc. According to functions and structural shapes, shafts have many types, such as smooth shaft, hollow shaft, half shaft, stepped shaft, spline shaft, crankshaft, camshaft, etc., which play a supporting, guiding and isolating role.
1. View representation
1) Shaft parts are mainly revolving bodies, which are generally processed on lathes and grinders. They are usually expressed in a basic view. The axis is horizontally placed, and the small head is placed on the right for easy viewing during processing.
2) It is better to draw a full shape with the single key groove on the shaft facing forward.
3) For the structure of shaft holes, keyways, etc., it is generally represented by partial sectional view or sectional drawing. The removed profile in the profile can not only clearly express the structure shape, but also conveniently mark the dimensional tolerance and geometric tolerance of the relevant structure.
4) Small structures such as undercuts and fillets are represented by local enlarged drawings.
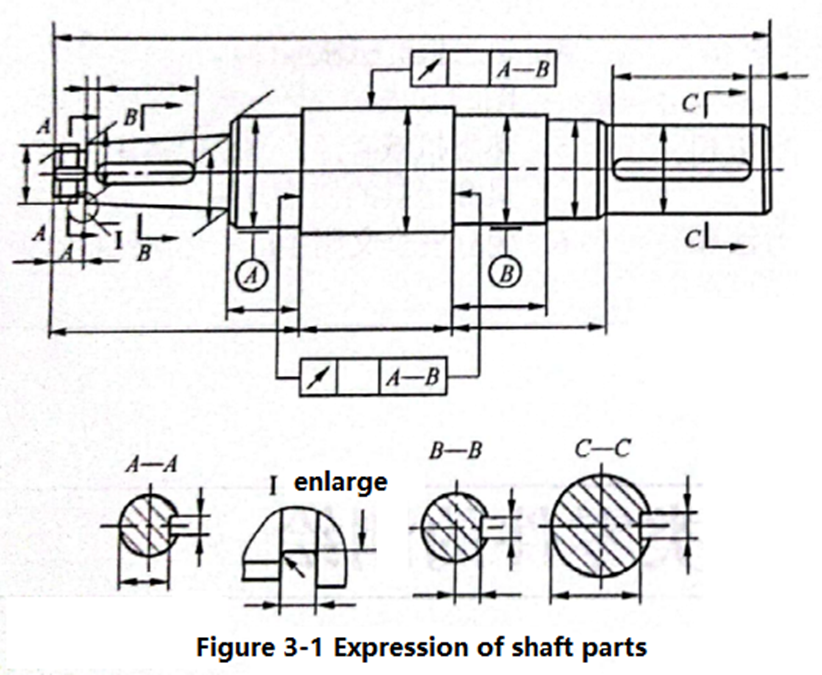
2. Dimension
① The main datum in the length direction is the main end face (shoulder) installed. The two ends of the shaft are generally used as the measurement datum, and the axis is generally used as the radial datum.
② The main dimensions shall be indicated first, and the length dimensions of other multi segments shall be indicated according to the turning sequence. Most of the local structures on the shaft are located near the shaft shoulder.
③ In order to make the marked dimensions clear and easy to see the drawing, the internal and external dimensions on the sectional view should be marked separately, and the dimensions of different processes such as turning, milling and drilling should be marked separately.
④ The chamfer, chamfer, undercut, grinding wheel overtravel groove, keyway, central hole and other structures on the shaft shall be marked after referring to the dimensions of relevant technical data.
3. Materials of shaft parts
① The common materials for shaft parts are 35, 45 and 50 high-quality carbon structural steel, among which 45 steel is the most widely used, and is generally subject to quenching and tempering treatment, with hardness of 230~260HBS.
② Q255, Q275 and other carbon structural steels can be used for shafts that are not very important or have small load.
③ Shafts with large force and high strength requirements can be quenched and tempered with 40Cr steel, with hardness of 230~240HBS or hardened to 35~42HRC.
④ For shaft parts working under high-speed and heavy load conditions, 20Cr, 20CrMnTi, 20Mn2B and other alloy structural steels or 38CrMoAIA high-quality alloy structural steels shall be selected. After carburizing and quenching or nitriding treatment, these steels not only have high surface hardness, but also greatly improve their central strength, with good wear resistance, impact toughness and fatigue strength.
⑤ Nodular cast iron and high-strength cast iron are often used to manufacture shafts with complex shape and structure due to their good casting performance and vibration reduction performance. Especially, the RE Mg ductile iron in our country has good impact resistance and toughness, as well as the advantages of antifriction and vibration absorption, and low sensitivity to stress concentration. It has been applied to important shaft parts in automobiles, tractors, and machine tools.
⑥ 45 and 50 medium carbon steels with tensile strength no less than 600MPa are generally used to obtain high hardness lead screws without final heat treatment. The lead screw of precision machine tool can be made of carbon tool steel T10 and T12. The screw rod with high hardness obtained through the final heat treatment can guarantee the hardness of 50-56HRC when it is made of CrWMn or CrMn steel.
4. Technical requirements for shaft parts
① Dimensional accuracy
The dimension accuracy of main journal diameter is generally IT6~IT9, and the precision is IT5. For each step length of stepped shaft, the tolerance shall be given according to the use requirements, or the tolerance shall be allocated according to the requirements of the assembly dimension chain.
② Geometric accuracy
The shaft is usually supported on the bearing by two journals, which are the assembly datum of the shaft. The geometric accuracy (roundness, cylindricity) of the supporting journal shall be generally required. The geometric form tolerance of journal with general accuracy shall be limited to the diameter tolerance range, that is, E shall be marked after the diameter tolerance according to the tolerance requirements, and if the requirements are higher, the allowable tolerance value shall be marked (that is, the shape tolerance value shall be marked with a frame in addition to E after the dimension tolerance).
③ Mutual position accuracy
The coaxiality of mating journals (journals for assembling transmission parts) in shaft parts relative to the supporting journals is a general requirement for their mutual position accuracy. Because of the convenience of measurement, it is usually represented by radial circular runout. The radial circular runout of the common fitting precision shaft to the supporting journal is generally 0.01~0.03mm, and that of the high-precision shaft is 0.001~0.005 mm. In addition, there are requirements for perpendicularity between axial positioning end face and axis line.
④ Surface roughness
Generally, the surface roughness of the supporting journal is Ra0.16~0.63um, and the surface roughness of the matching journal is Ra0.63~2.5um. For general parts and typical parts, there are generally corresponding tables and data available for the above items.

